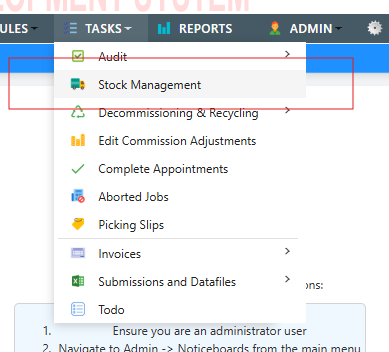
All stock operations are performed from a single screen: open it by clicking Tasks Stock Management Stock Management. The screen is organised into tabs.
Stock Levels
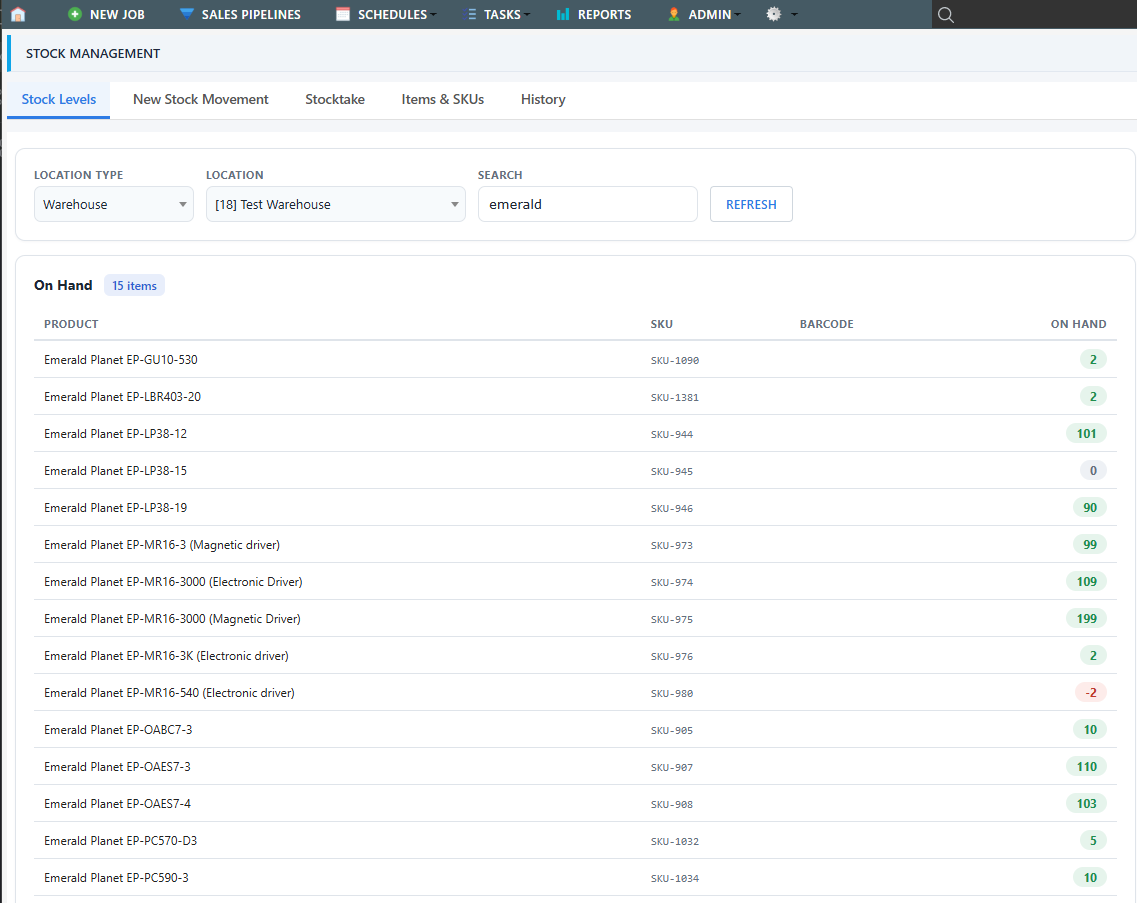
Shows the current stock on hand for any warehouse or field worker. Pick the location type and the location, then filter the list by typing a product name, SKU or barcode into the search box. Negative balances are highlighted so discrepancies stand out.
New Stock Movement
Records a stock movement - receiving from a supplier, issuing to a field worker, returns, and transfers between warehouses or field workers. Refer to Recording Stock Movements for the step-by-step guide.
Stocktake
Records a physical count for a warehouse or field worker:
- Select the location type and location, then click Start Stocktake. Dataforce ASAP snapshots the expected quantity of every item the location holds into a count sheet.
-
Enter the counted quantities. The variance against the expected quantity is shown live as you type. You can Save Counts at any point and come back to finish.
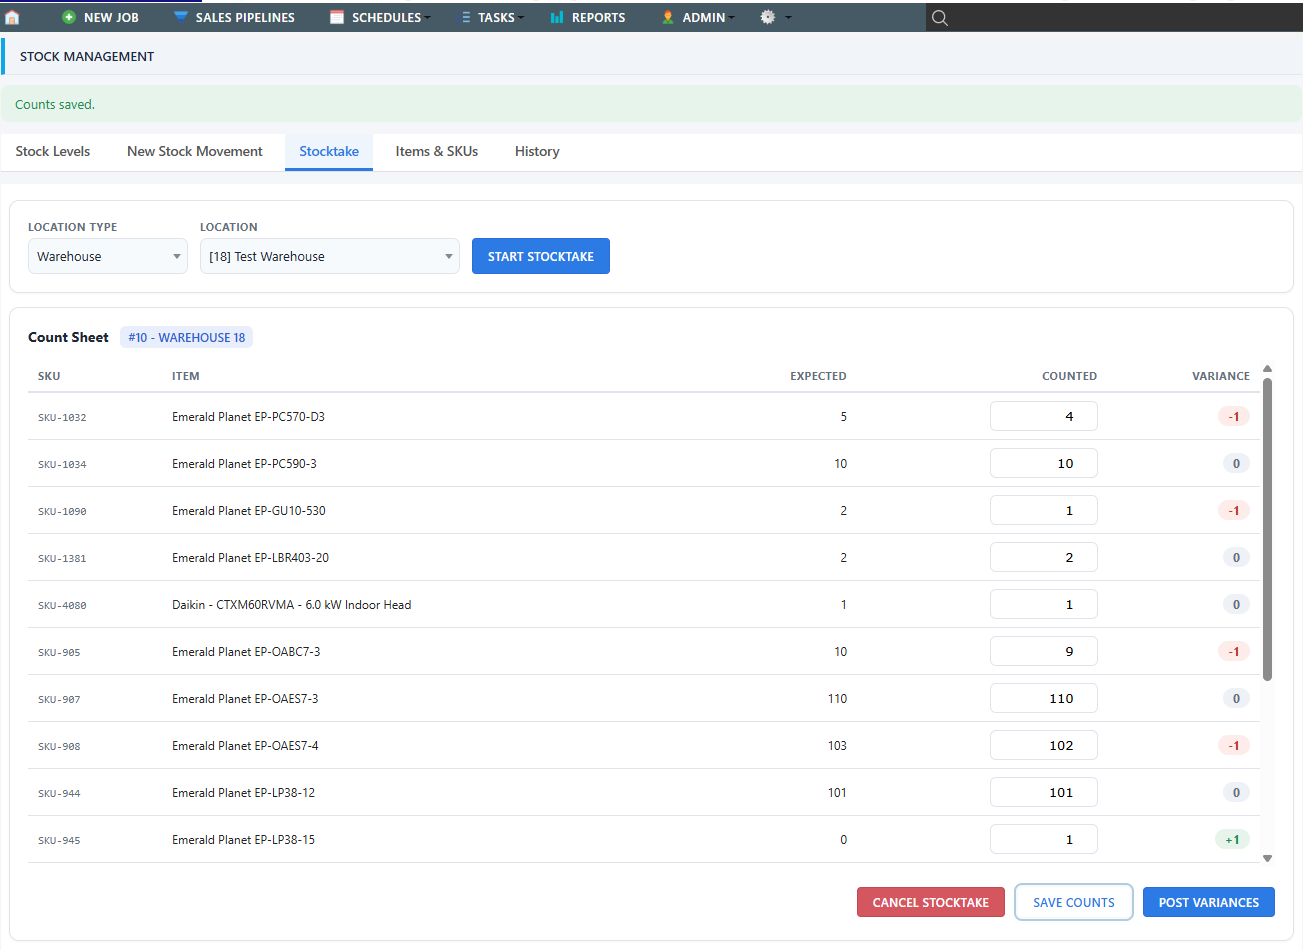
- Click Post Variances. The differences between the count and the system quantities are recorded as correction movements, and stock on hand immediately matches what was counted.
A stocktake can be abandoned with Cancel Stocktake before it is posted; nothing moves until variances are posted.
Items & SKUs
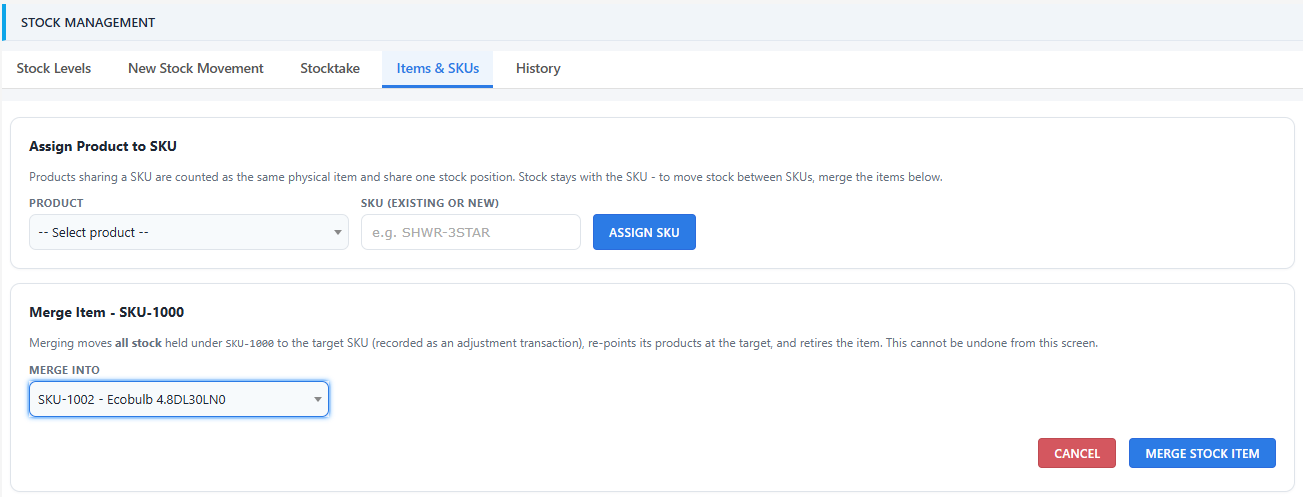
Manages the stock items (SKUs) that stock is counted against. Products sharing a SKU are treated as one physical item with one stock position (see Stock Concepts).
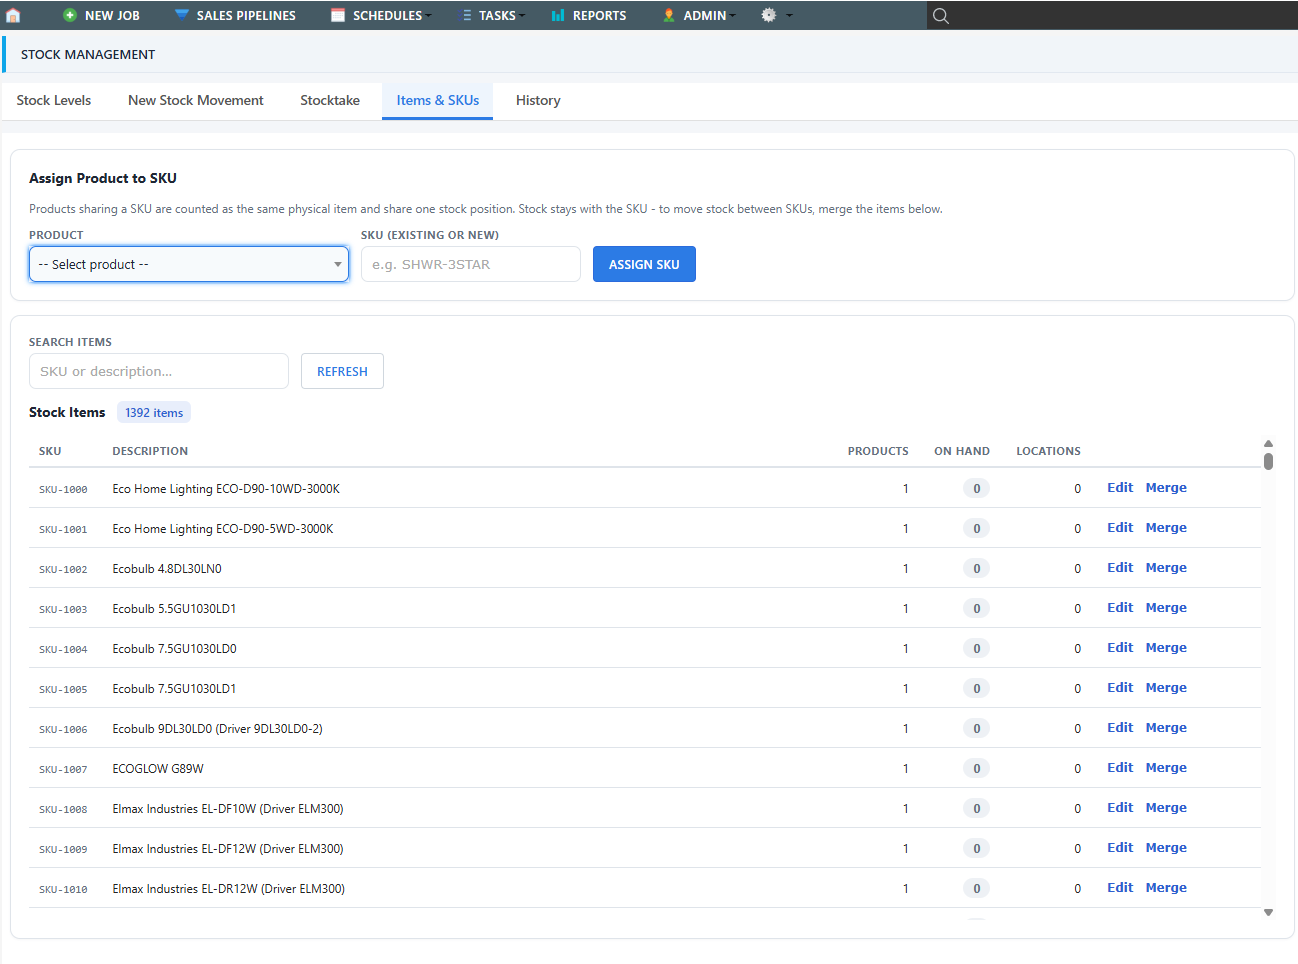
- Assign Product to SKU - point a product at an existing SKU, or type a new one to create it. Stock always stays with the SKU; if reassigning a product would leave stock on an item that no product is linked to, the change is blocked and you should merge the items instead.
- Edit - rename a SKU or its description. The product group follows the rename.
-
Merge - combine two stock items that are really the same physical item: all stock held under the source SKU moves to the target (recorded as an adjustment movement), the source’s products are re-pointed at the target SKU, and the source item is retired. This cannot be undone from the screen, so check the product chips shown in the editor before confirming.
History
Lists every stock change for the selected date range. Selecting a row opens the movement’s line detail below the list, and enables two actions:
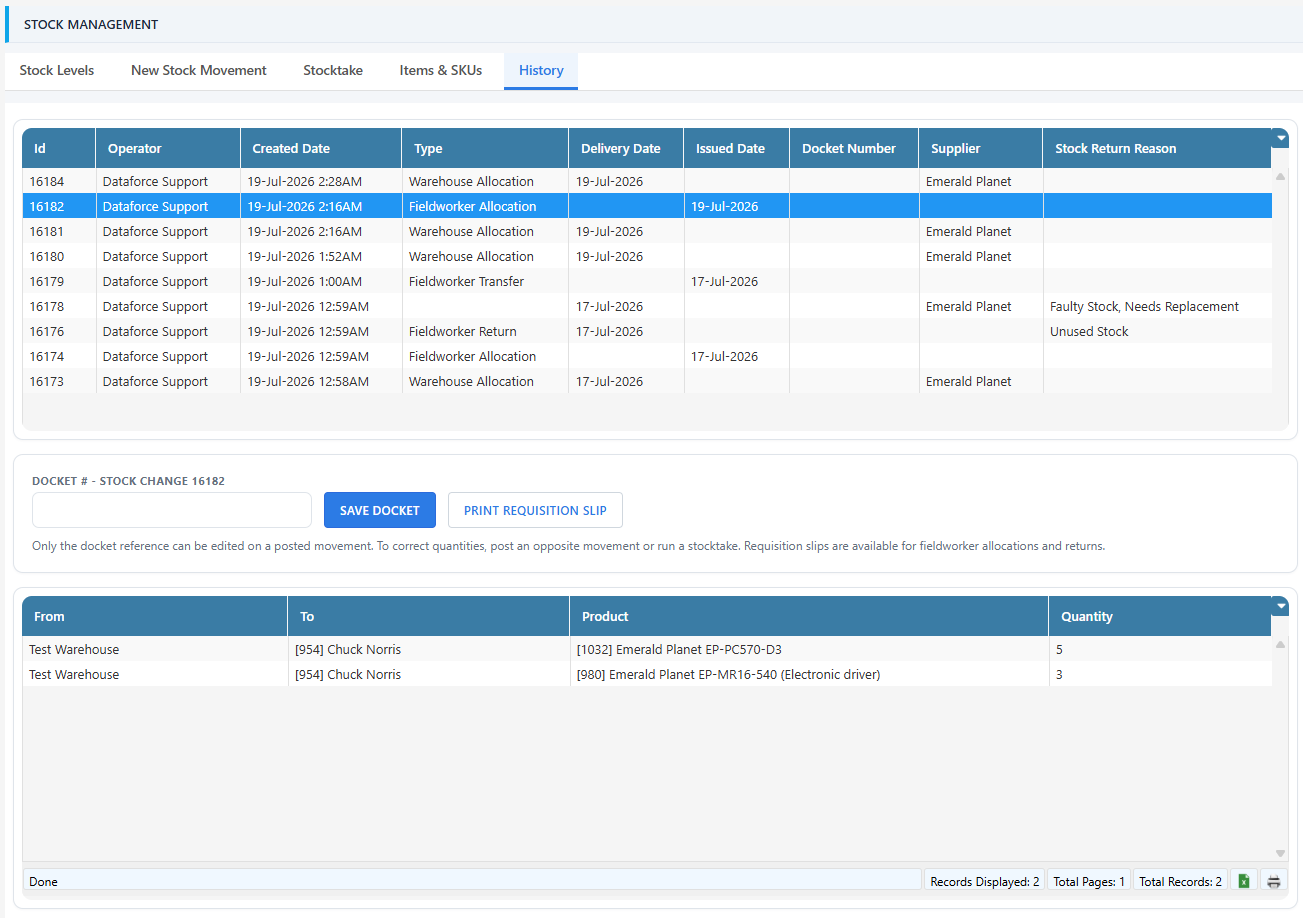
- Docket editing - the docket reference is the one detail of a posted movement that can be corrected (quantities, locations and dates cannot - refer to Correcting Stock Mistakes). Saving updates the movement and its related records everywhere the docket is shown.
- Print Requisition Slip - available for field worker allocations and returns. Prints a slip showing the date, who issued and received the stock, the docket number, the items and quantities, with signature blocks for the receiver and issuer.
Product Configuration
Before a product can be tracked:
- Check the “Enable Stock Tracking” flag on the product details screen.
- (Optional) Enter the product’s barcode - the movement and stock level screens can then find the product by scanning or typing the barcode.
- Enter the suppliers that supply the product, so it appears when receiving stock from them.
The product’s SKU is shown read-only on the product details screen and is assigned automatically the first time stock is tracked; use the Items & SKUs tab to change it or to group products together.
Stock tracking can be switched off again, with two rules: stock history is always kept, and tracking cannot be disabled while the product’s SKU still has stock on hand (return, write off or stocktake it to zero first).