A guide on requesting Customer Consent via ASAP
Capturing Customer Consent in ASAP
This guide outlines the process for sending, signing, and storing customer consent forms within ASAP.
1. Send Consent Form to Customer
- Navigate to the Customer Details screen
- Open the Marketing Consent tab
- Use the “Select a consent form” dropdown to choose the appropriate form
- Click “Send consent to sign”
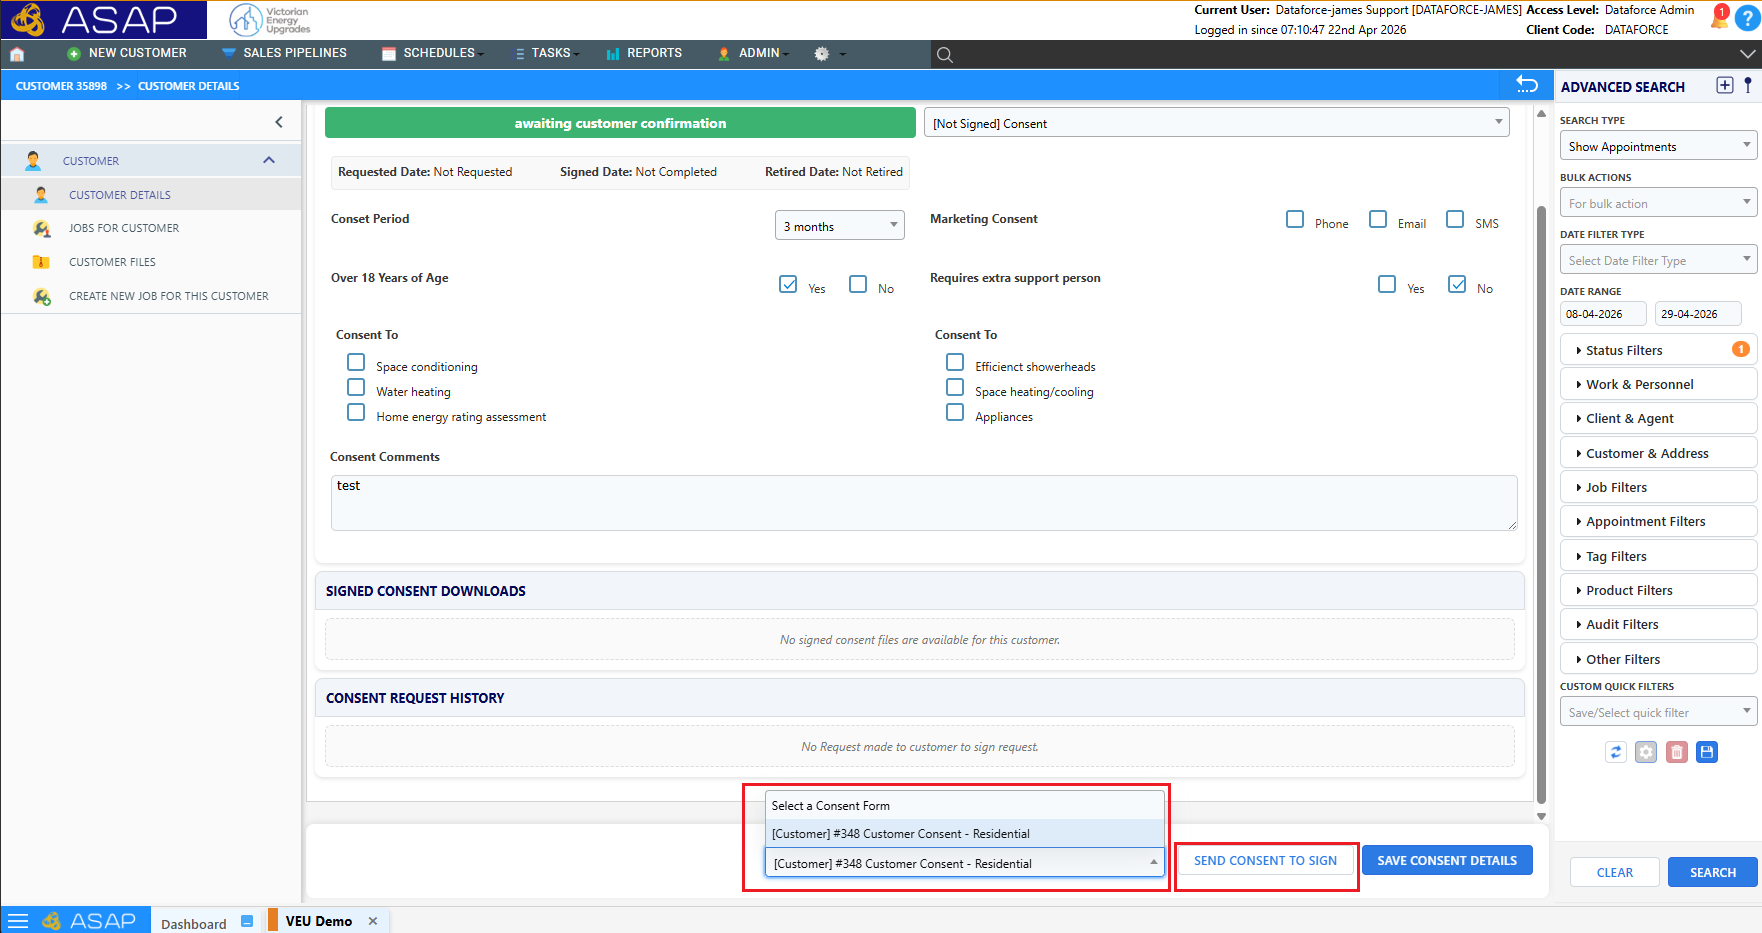
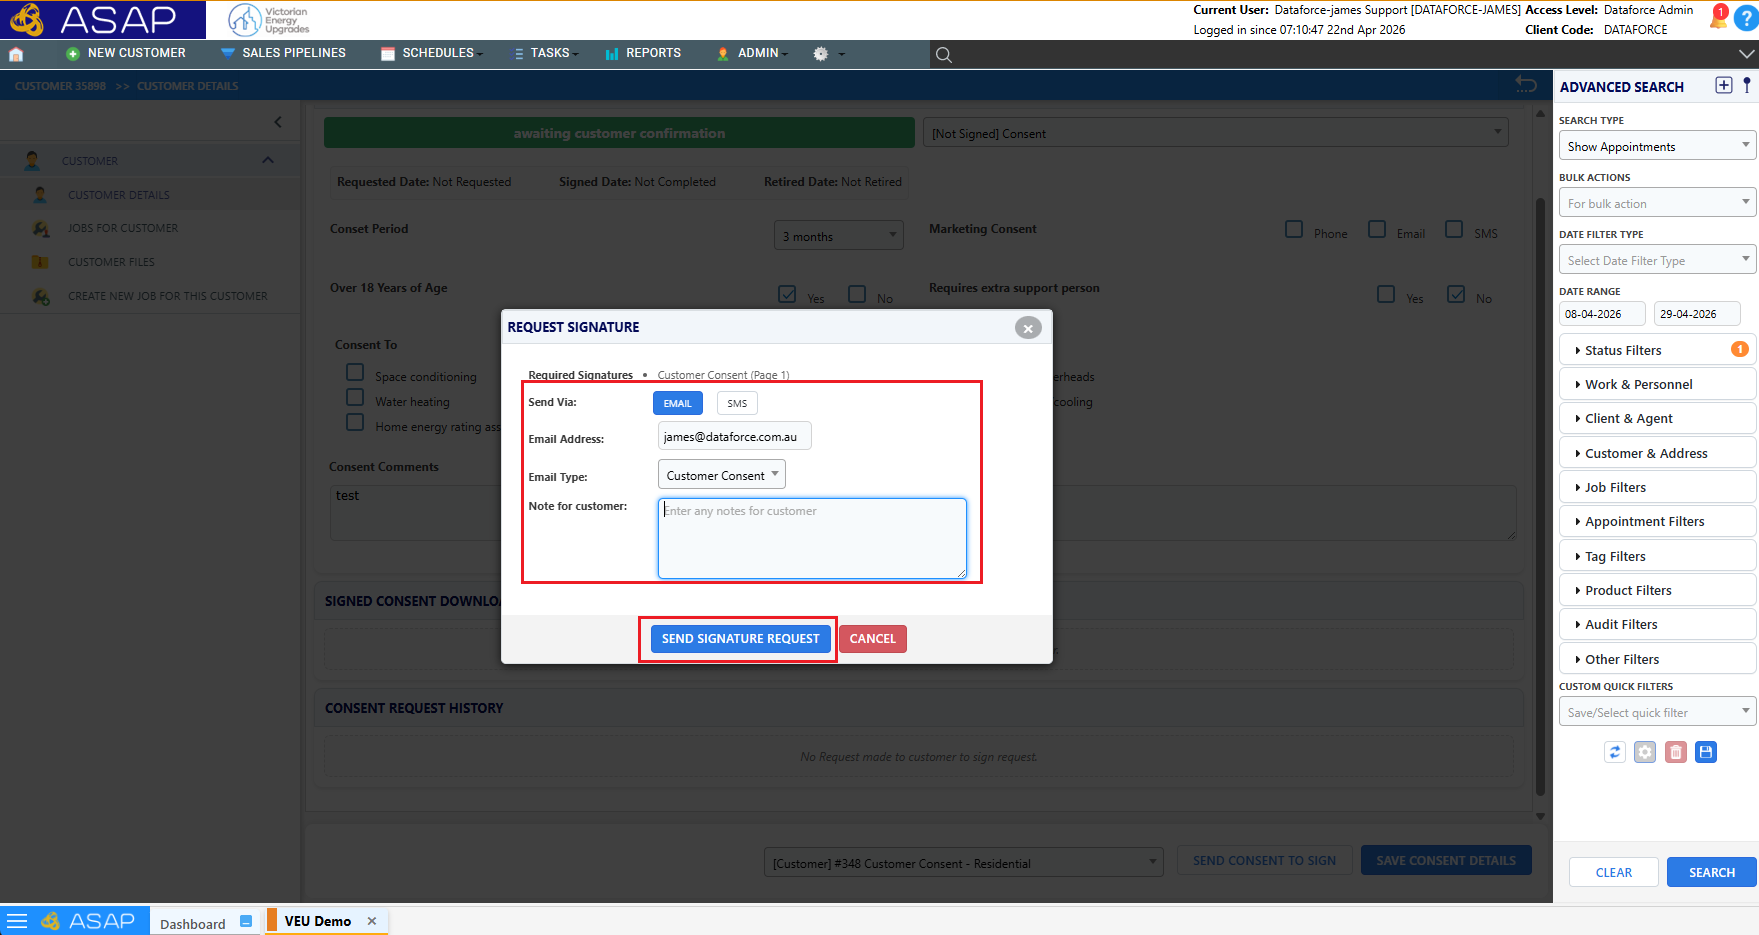
- Enter the request details (Email/SMS)
2. Customer Receives and Opens the Consent Form
- The customer receives an email containing a secure link
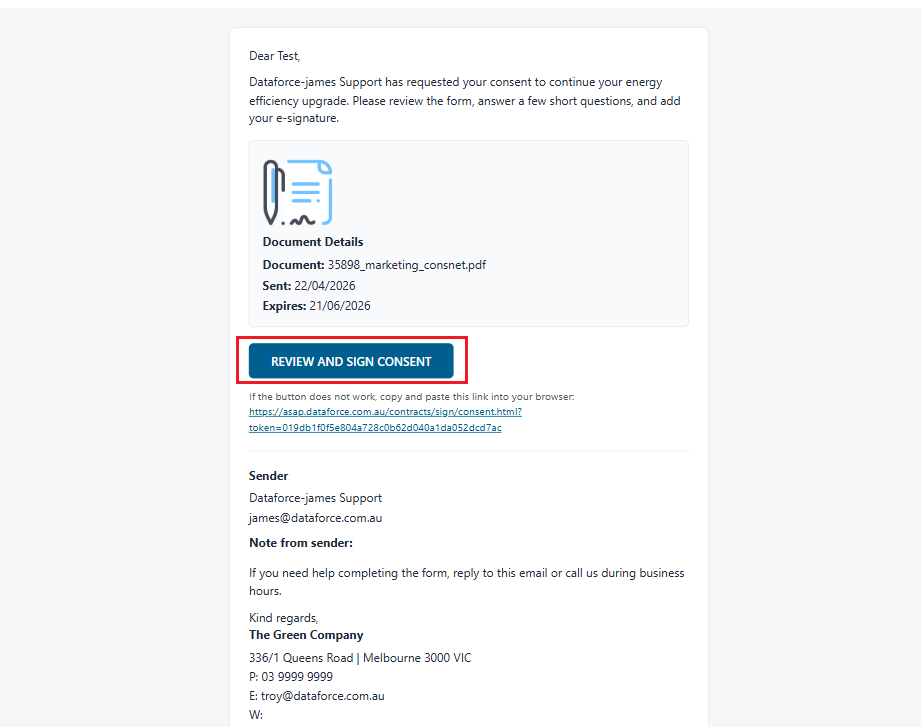
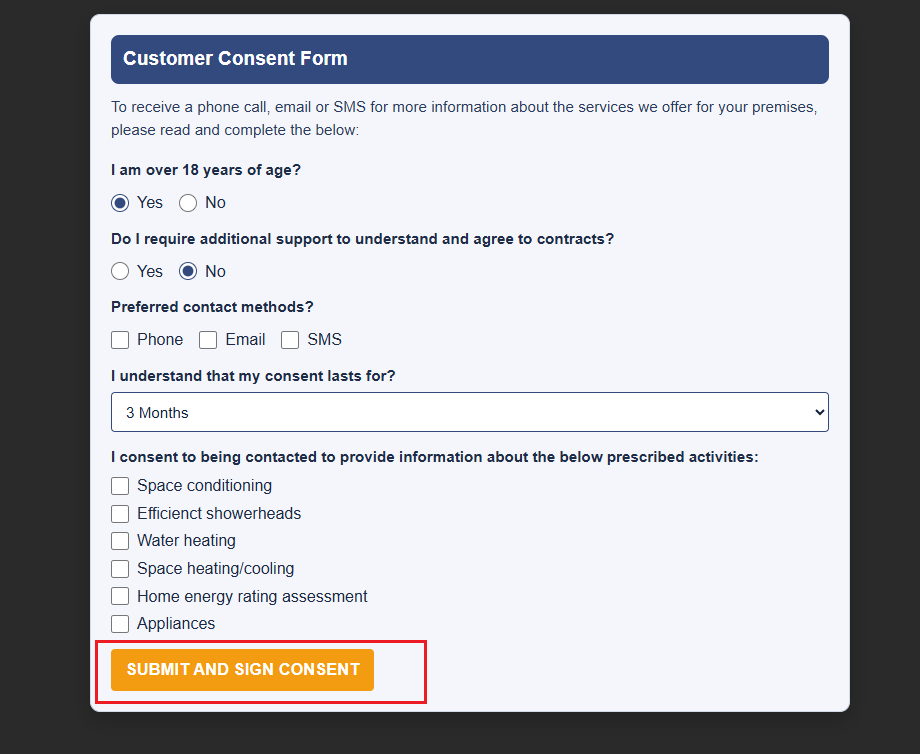
- Clicking the link opens a webpage where they can:
- Review available consent options (if applicable)
- Complete and sign the consent form
3. Customer Confirms Submission
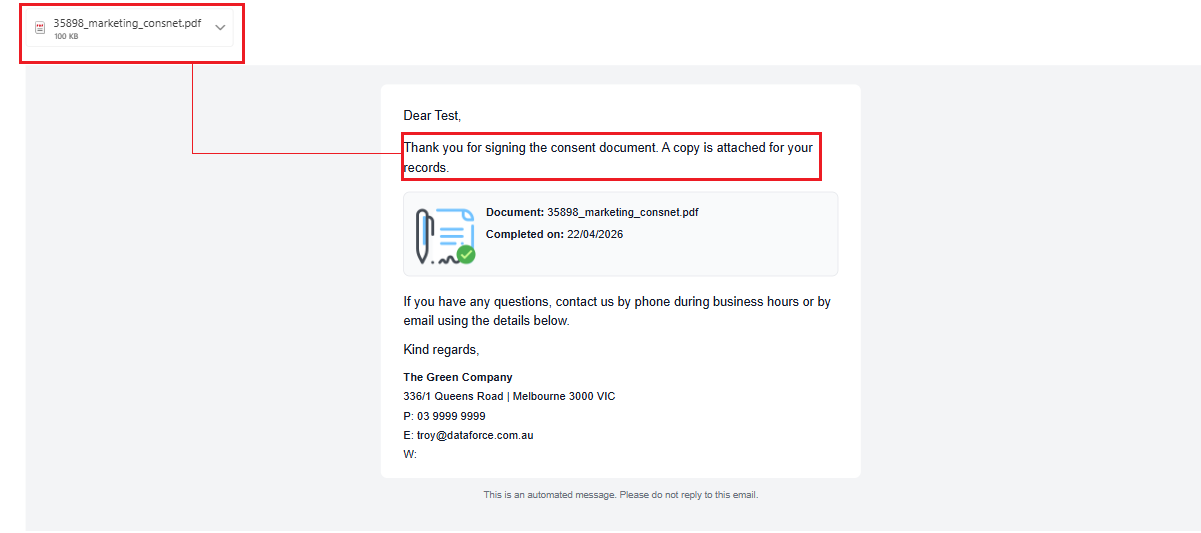
- After signing, the customer is shown a confirmation message
- This confirms the consent has been successfully submitted
- The customer will also receive an email confirmation with a copy of the signed consent form for their records
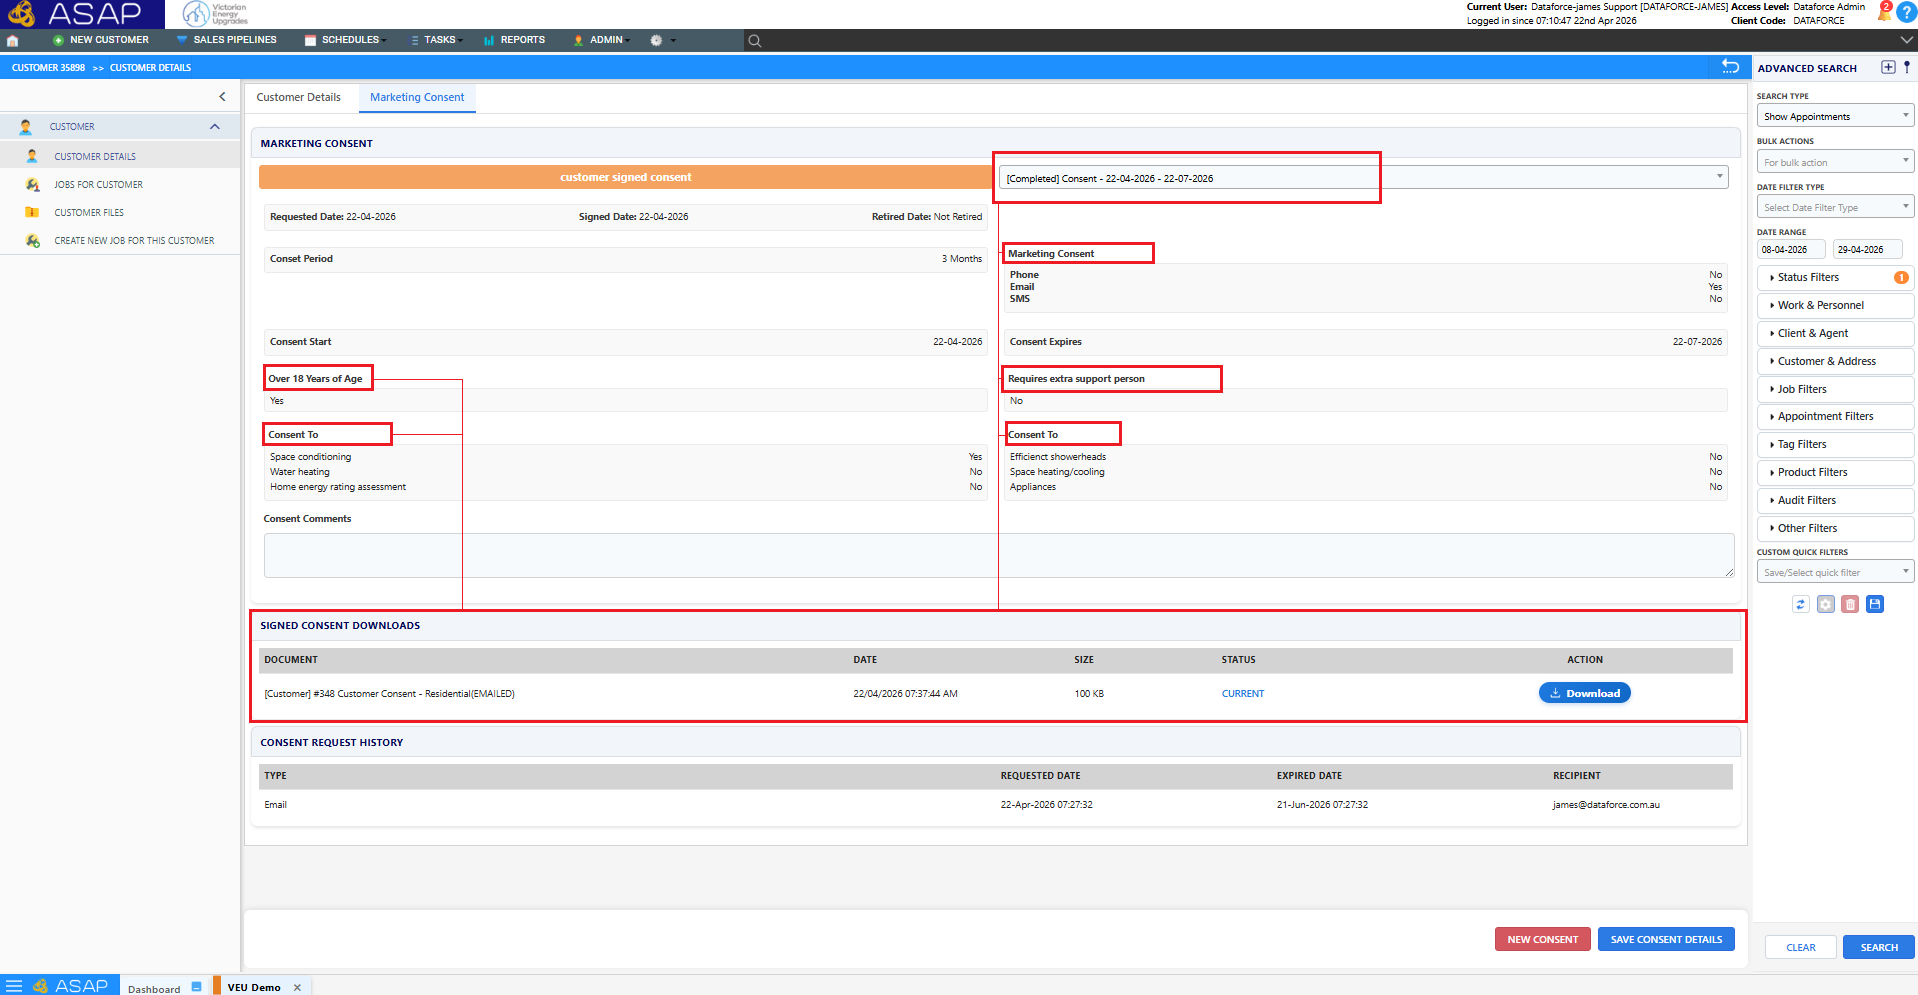
4. Consent Stored in ASAP
- The signed consent form is automatically saved in ASAP
- It will appear under the Marketing Consent tab
- Status will update to: “Customer Signed Consent”
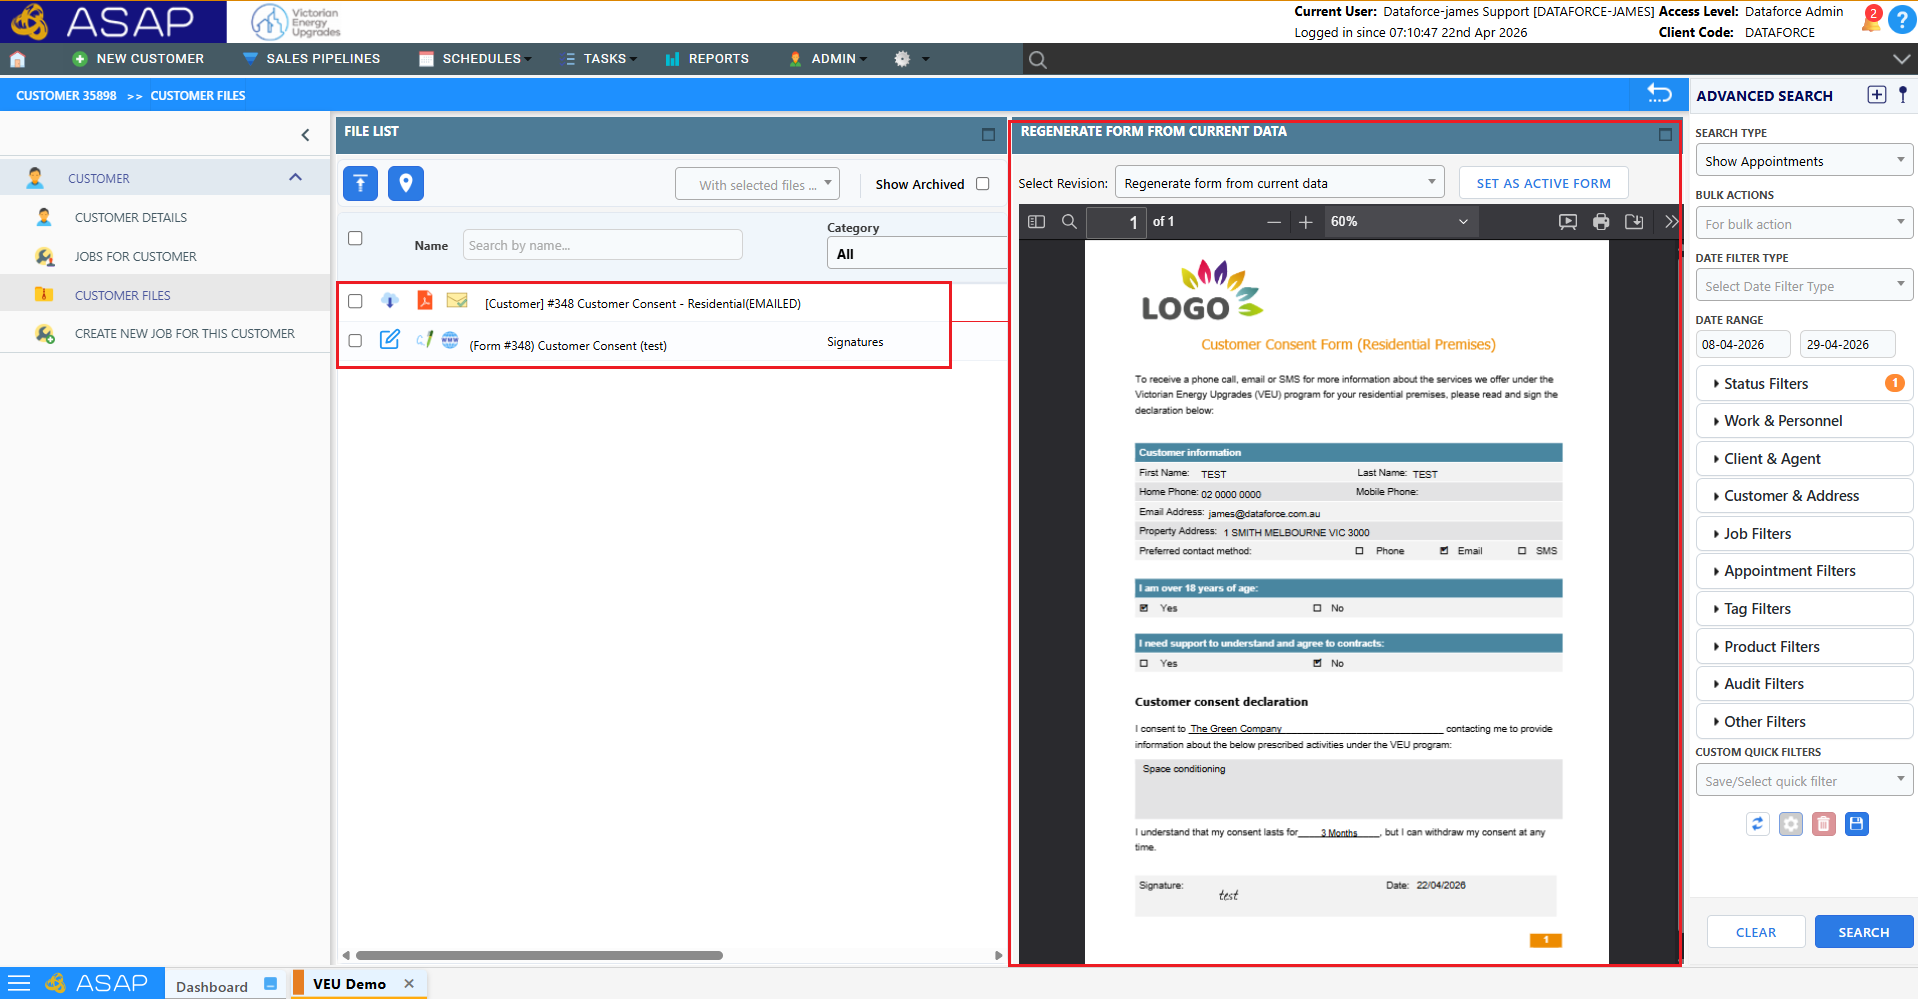
5. Accessing the Signed Document
- The signed consent form and signature are also stored in:
- Files and Photos tab
- This allows for:
- Viewing
- Downloading
- Audit/reference purposes
Key Notes
- Ensure the correct consent form is selected before sending
- The process is fully digital — no manual upload required after signing
- Status updates occur automatically once the customer completes the form
- Customers receive a copy of the signed consent form via email after submission