This page outlines the end-to-end process for registering a sender ID or Mobile Number across Dataforce, Sinch, and ACMA.
From 1 July 2026, all Sender IDs used to send messages to Australian mobile numbers must be registered on the ACMA national SMS Sender ID Register. Messages sent from unregistered Sender IDs will be labelled ‘Unverified’, which may affect how your customers perceive your communications.
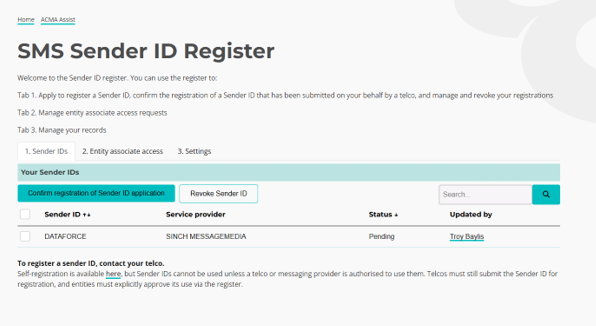
This page walks you through how to register your Sender ID through Dataforce ASAP. The process involves submission through ASAP, review by Sinch MessageMedia, and final approval via ACMA Assist.
To be eligible for registration, your Sender ID must:
- Be between 2 and 11 characters.
- Use only standard ASCII characters.
- Not consist solely of restricted words.
- Reflect a valid use case such as a registered business name or domain.
For the full eligibility criteria, refer to the ACMA website.
Step 1: Submit your Sender ID Request
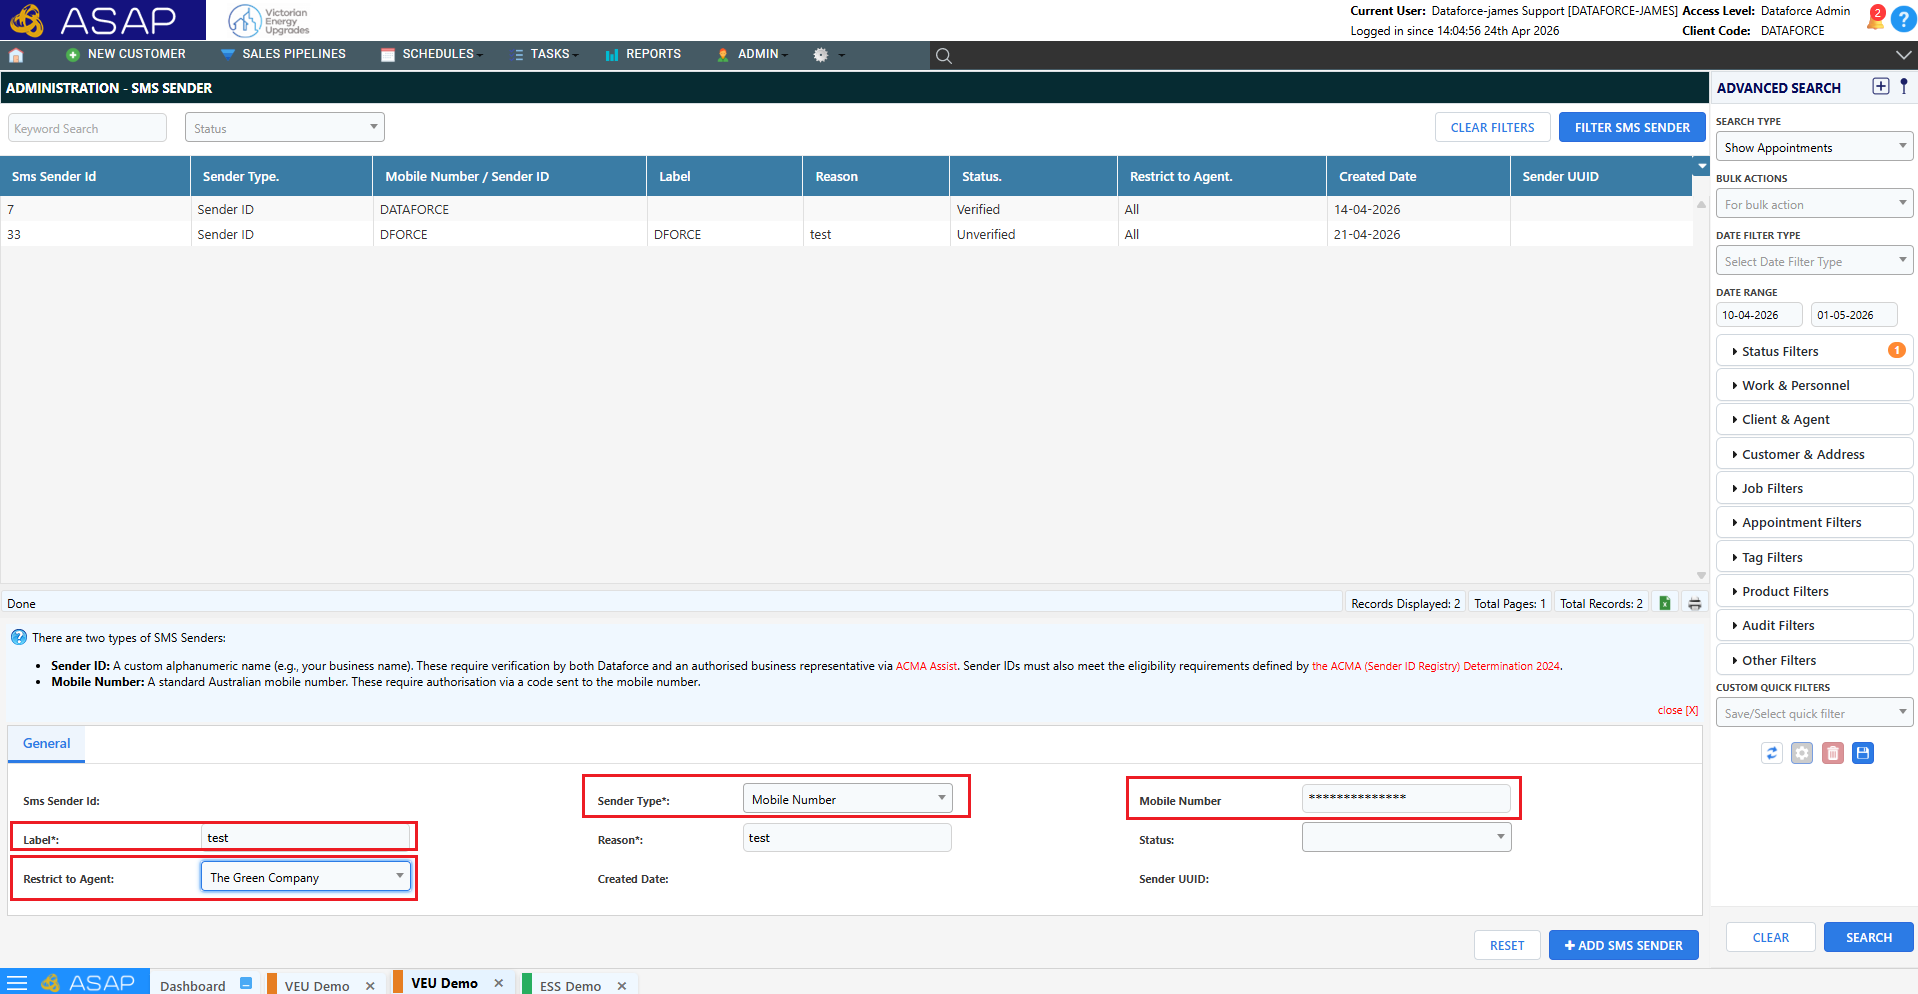
Complete and submit a sender ID request form via ASAP.
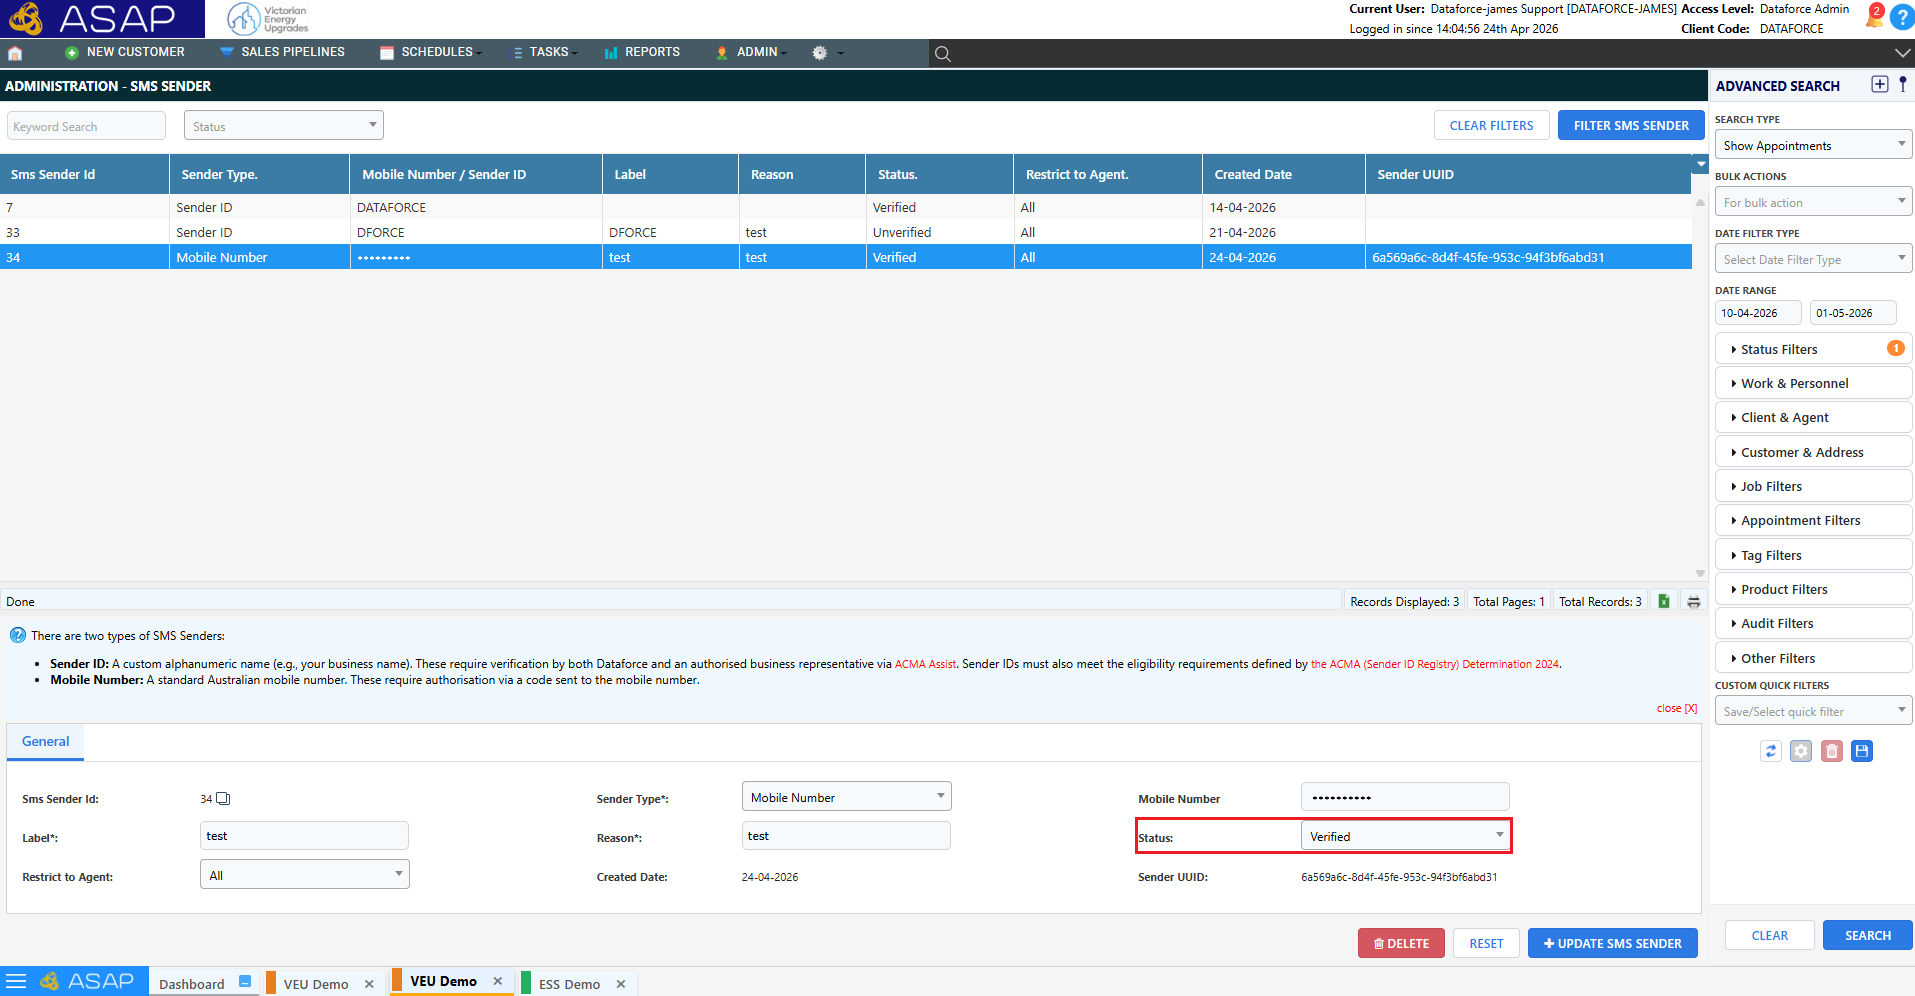
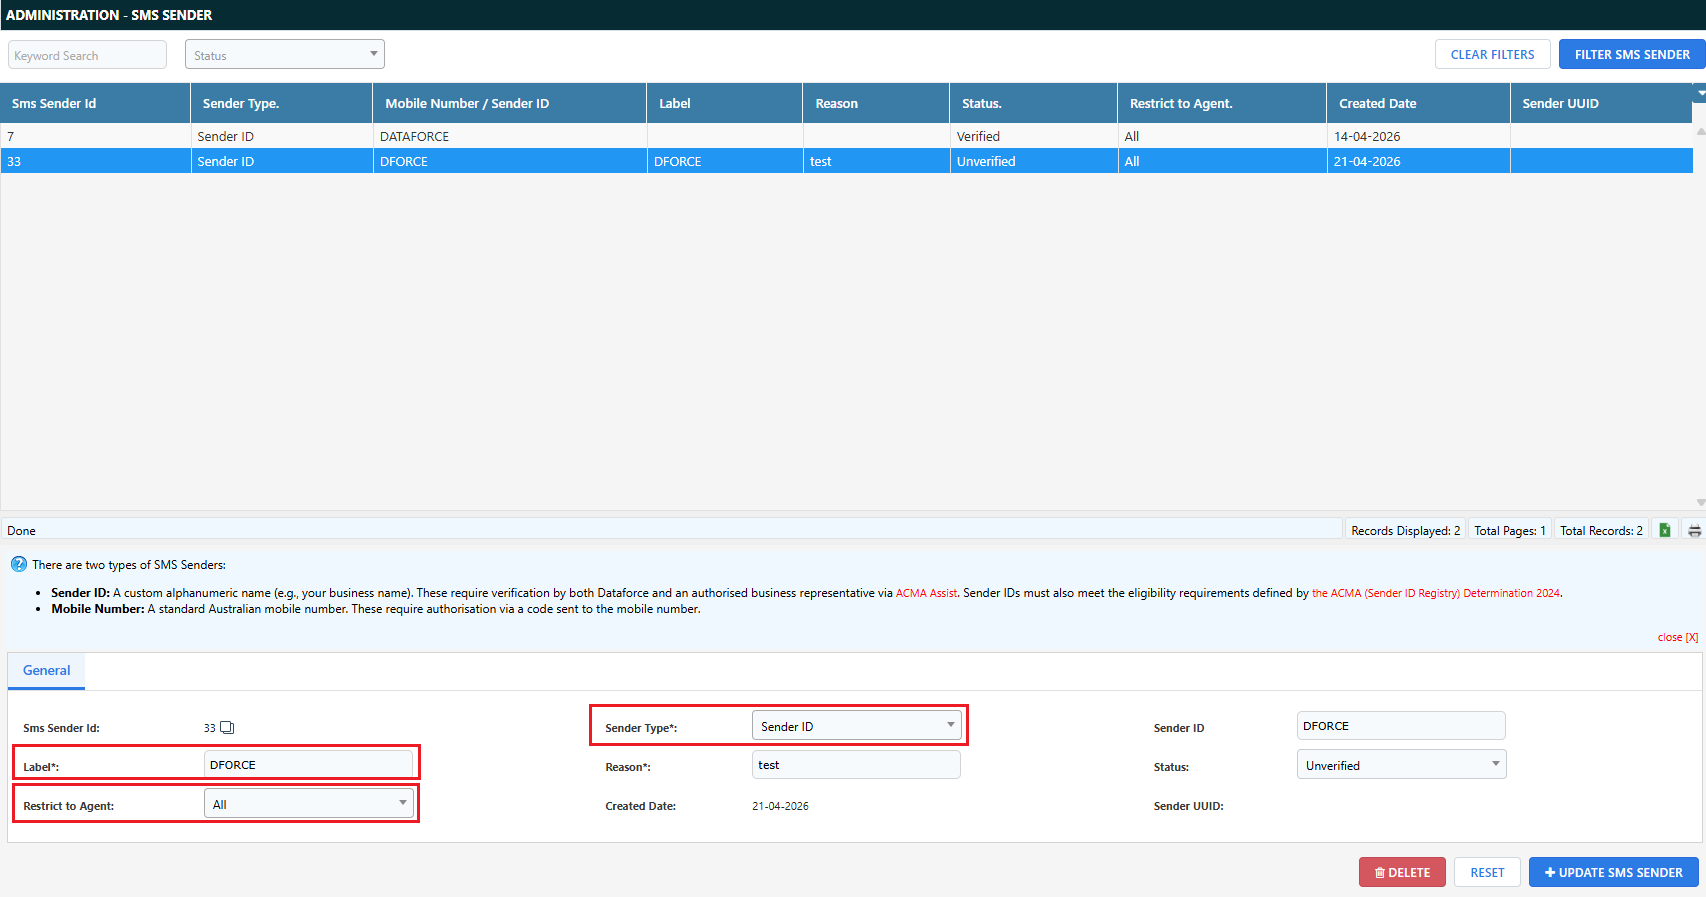
- Navigate to the (Configuration icon) Emails and SMS Settings Verified SMS Senders to view and manage all sender ID requests.
Fill in the following fields
- Sender Type: Sender ID
- Restrict to Agent (Optional)
- Label
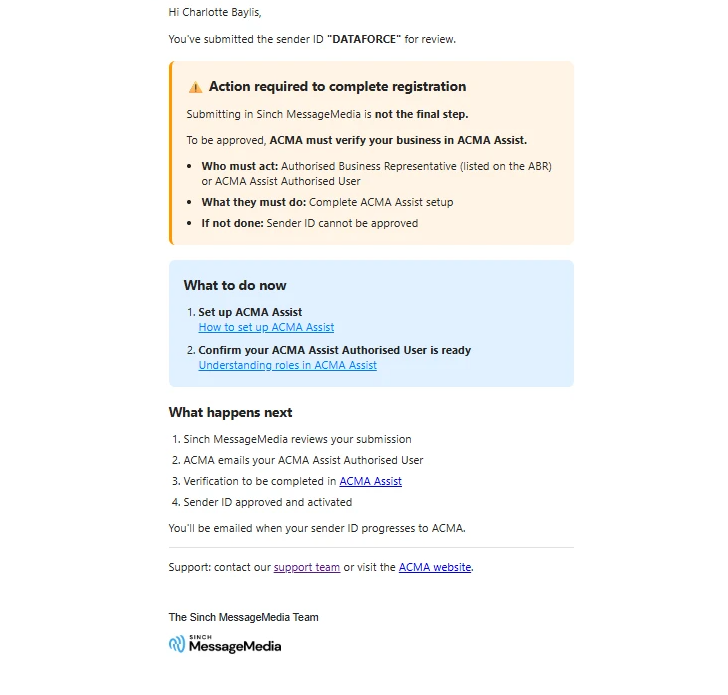
Step 2: Your request will be reviewed and submitted for registration.
No action is required during this stage.
Once your Sender ID has been submitted you may receive a confirmation by email indicating that you request has progressed.
Step 3: Check your email from ACMA
An email will be sent to your authorised representative by ACMA (Australian Communications and Media Authority)
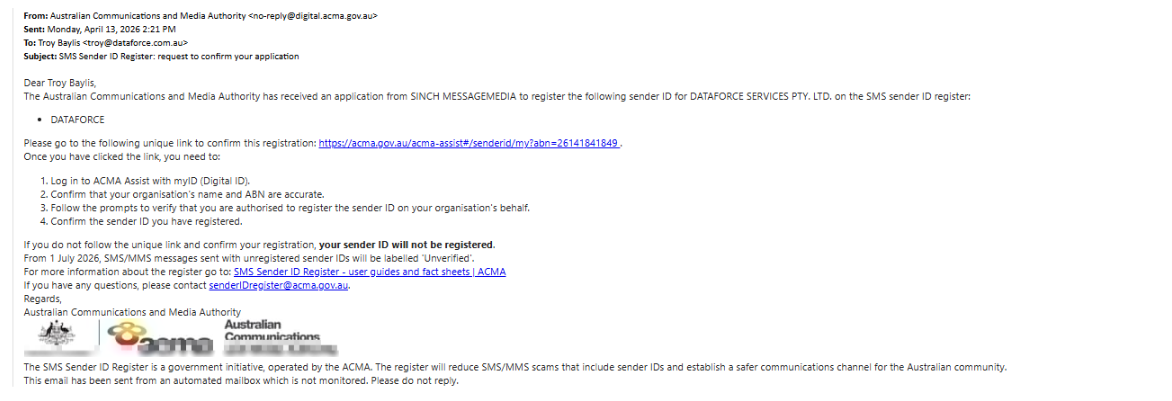
Step 4: Approve your Sender ID in ACMA Assist
Please note: Only the Authorised Business Representative can approve the request on behalf of the business
- Log in using your myGovID
- Confirm your ABN and Company Name
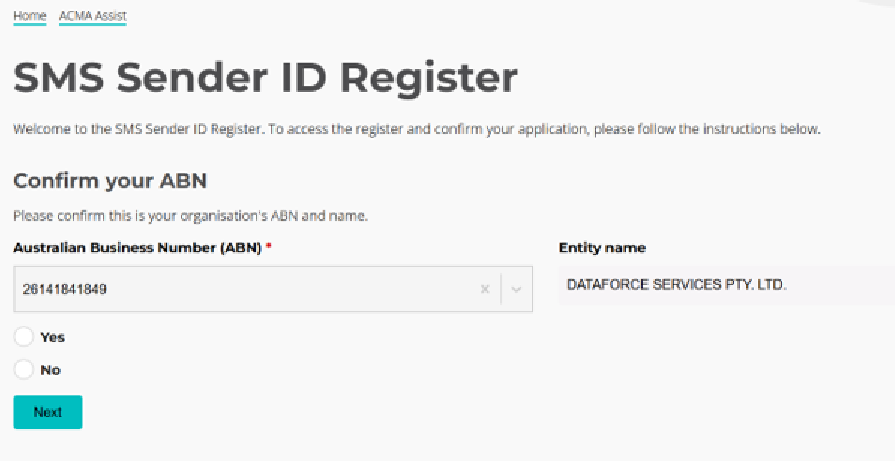
- Confirm website, property address, email address, phone
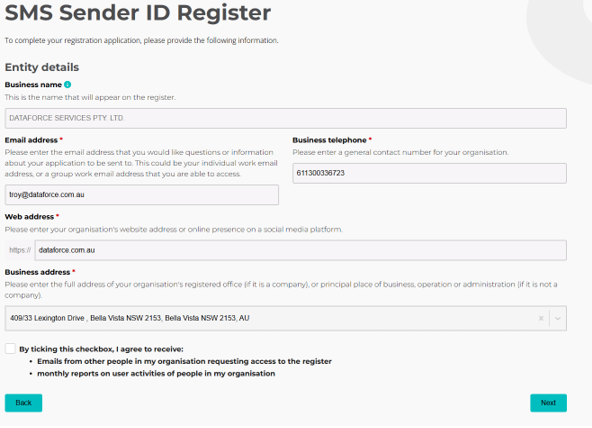
- Approve the Sender ID request
Step 5: Wait for activation
After approval from ACMA Assist, your Sender ID will be processed and activated. This may take a few hours. Once activation is complete via ACMA, we will update this accordingly in ASAP. An email will be sent to the authorised business representative notifying them of this.
Step 1: Create SMS Sender (Mobile Number)
Fill in the following fields
- Sender Type: Mobile Number
- Restrict to Agent (Optional)
- Label
- Mobile Number
- Click Add SMS Sender
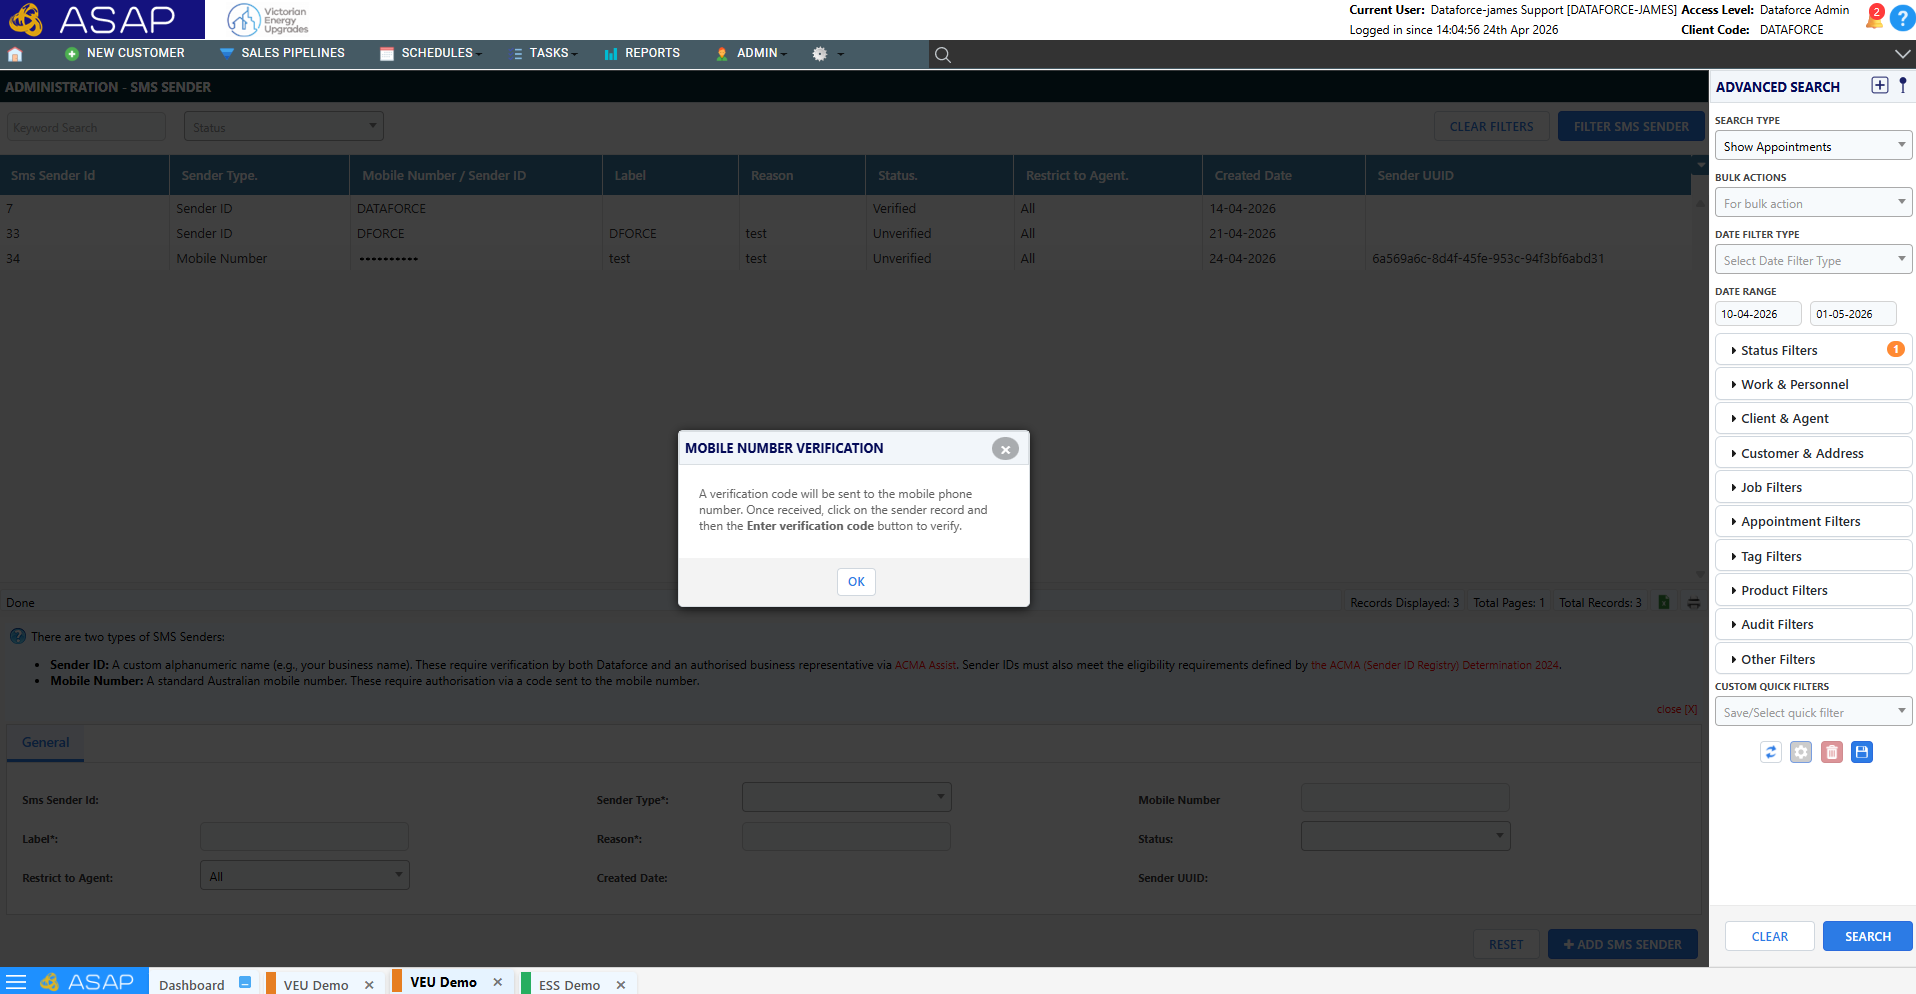
Step 2: Verify Mobile Number
- Upon clicking Add SMS Sender a dialogue will appear informing you that a code has been sent to the respective mobile number
- Enter verification code by clicking ENTER VERIFICATION CODE and following the prompt that appears
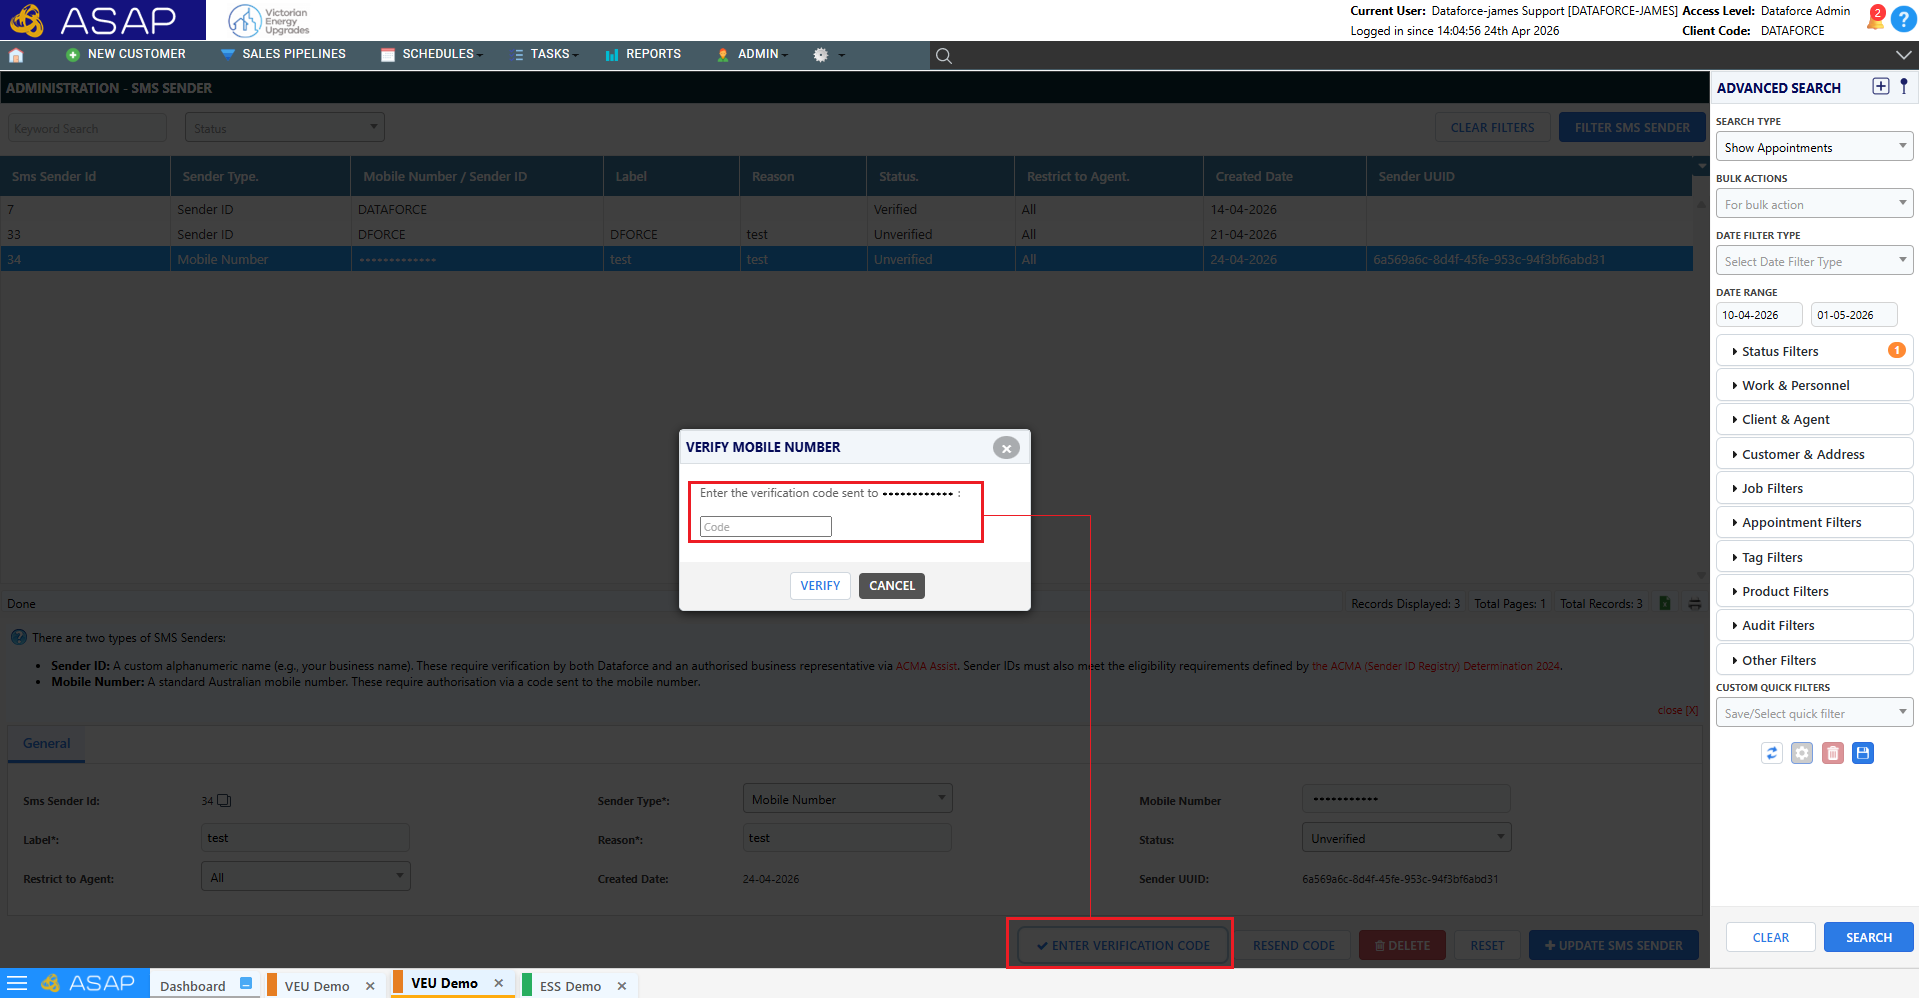
- Once the code has been entered and accepted, the SMS Sender type will now be display in the list with a status of Verified